
Connect Chrona
Add https://mcp.chrona365.com/mcp as an MCP server in your agent. This server supplies the guide and configuration plan.
Connect your agent to Chrona and Dataverse. It can read the guide, map your table and set up the scheduler. You confirm the choices about your data before it writes the settings.
Replace the two bracketed details, then send this to your connected agent.
Install Chrona Scheduler from https://github.com/konfigure8/chrona-scheduler in my Power Platform environment at [environment URL]. Use the Chrona MCP server at https://mcp.chrona365.com/mcp and my Dataverse tools. Set it up on my [table name]. Inspect the table first. Ask me to confirm the view, the title, start, end and resource columns, the display time zone and the colours before you write the configuration. Show me the proposed changes, then verify the board in the app. If you cannot create or publish the app with your tools, guide me through that step in the maker portal.
The agent needs access to the guide and permission to work in your own environment.
Add https://mcp.chrona365.com/mcp as an MCP server in your agent. This server supplies the guide and configuration plan.
Give your agent Dataverse tools for your environment. The agent uses those tools under your identity to make the changes.
Replace the environment URL and table name above. Review the proposed mapping and settings before the agent writes them.
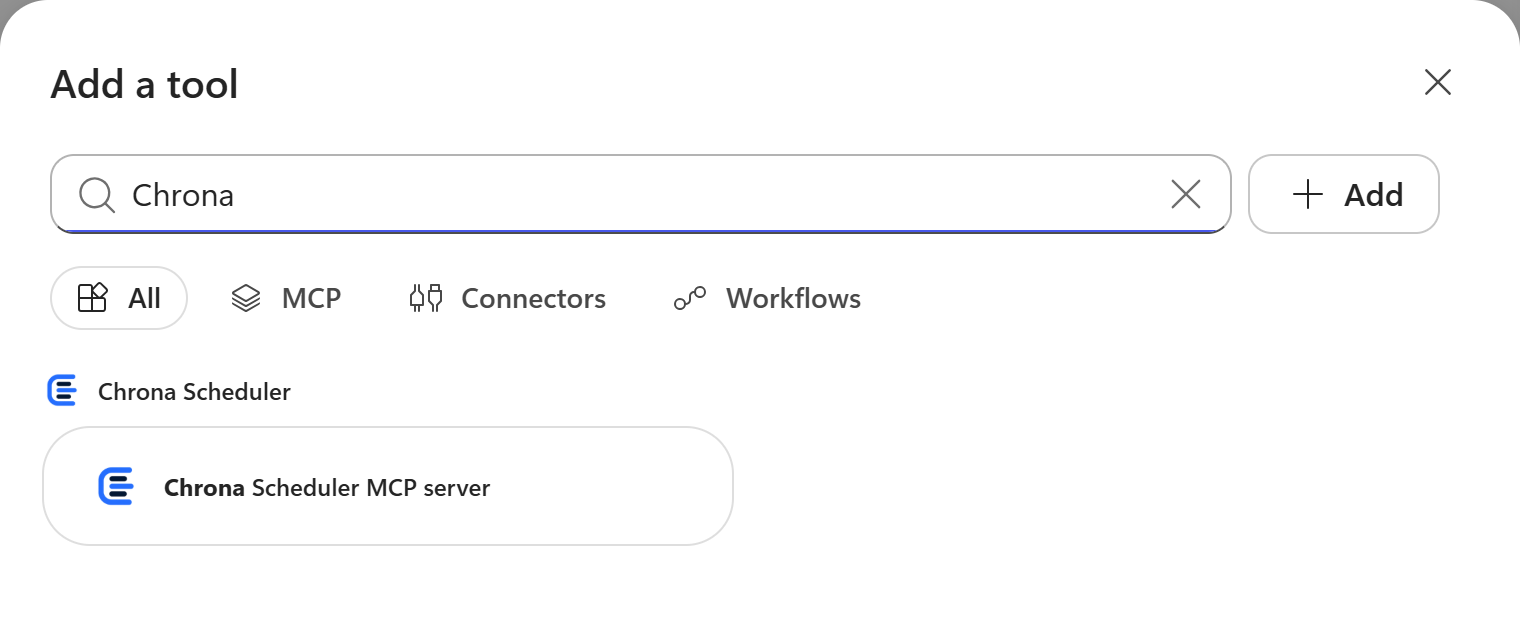
Using Copilot Studio? Import the managed solution first. Its connector then appears as Chrona Scheduler in Add a tool. See the install guide.
An excerpt from an agent install in a new environment. The agent inspected the table and asked the builder to confirm its proposed settings.
The solution is imported and the roles exist. Your Job table’s shape is clear, so I only need you to confirm a few choices before I write the binding and the configuration rows.
Stored job times are 22:00 to 01:00 UTC and 03:00 to 07:00 UTC, which read as 08:00 to 11:00 and 13:00 to 17:00 in Brisbane or Sydney.
Here is the mapping and the view setup I would write. Check these choices first.
Reply with “go” to accept all of this, or tell me what to change.
go — Brisbane is right, and colour by status is what I want. No other users need roles yet.
Done. Chrona Scheduler is installed and running on your Job table. I verified it in the browser: the Active Jobs view opens as the scheduler with North and South lanes, Brisbane time, 08:00 to 17:00 shaded, and the 8 planned jobs waiting in the unscheduled panel.
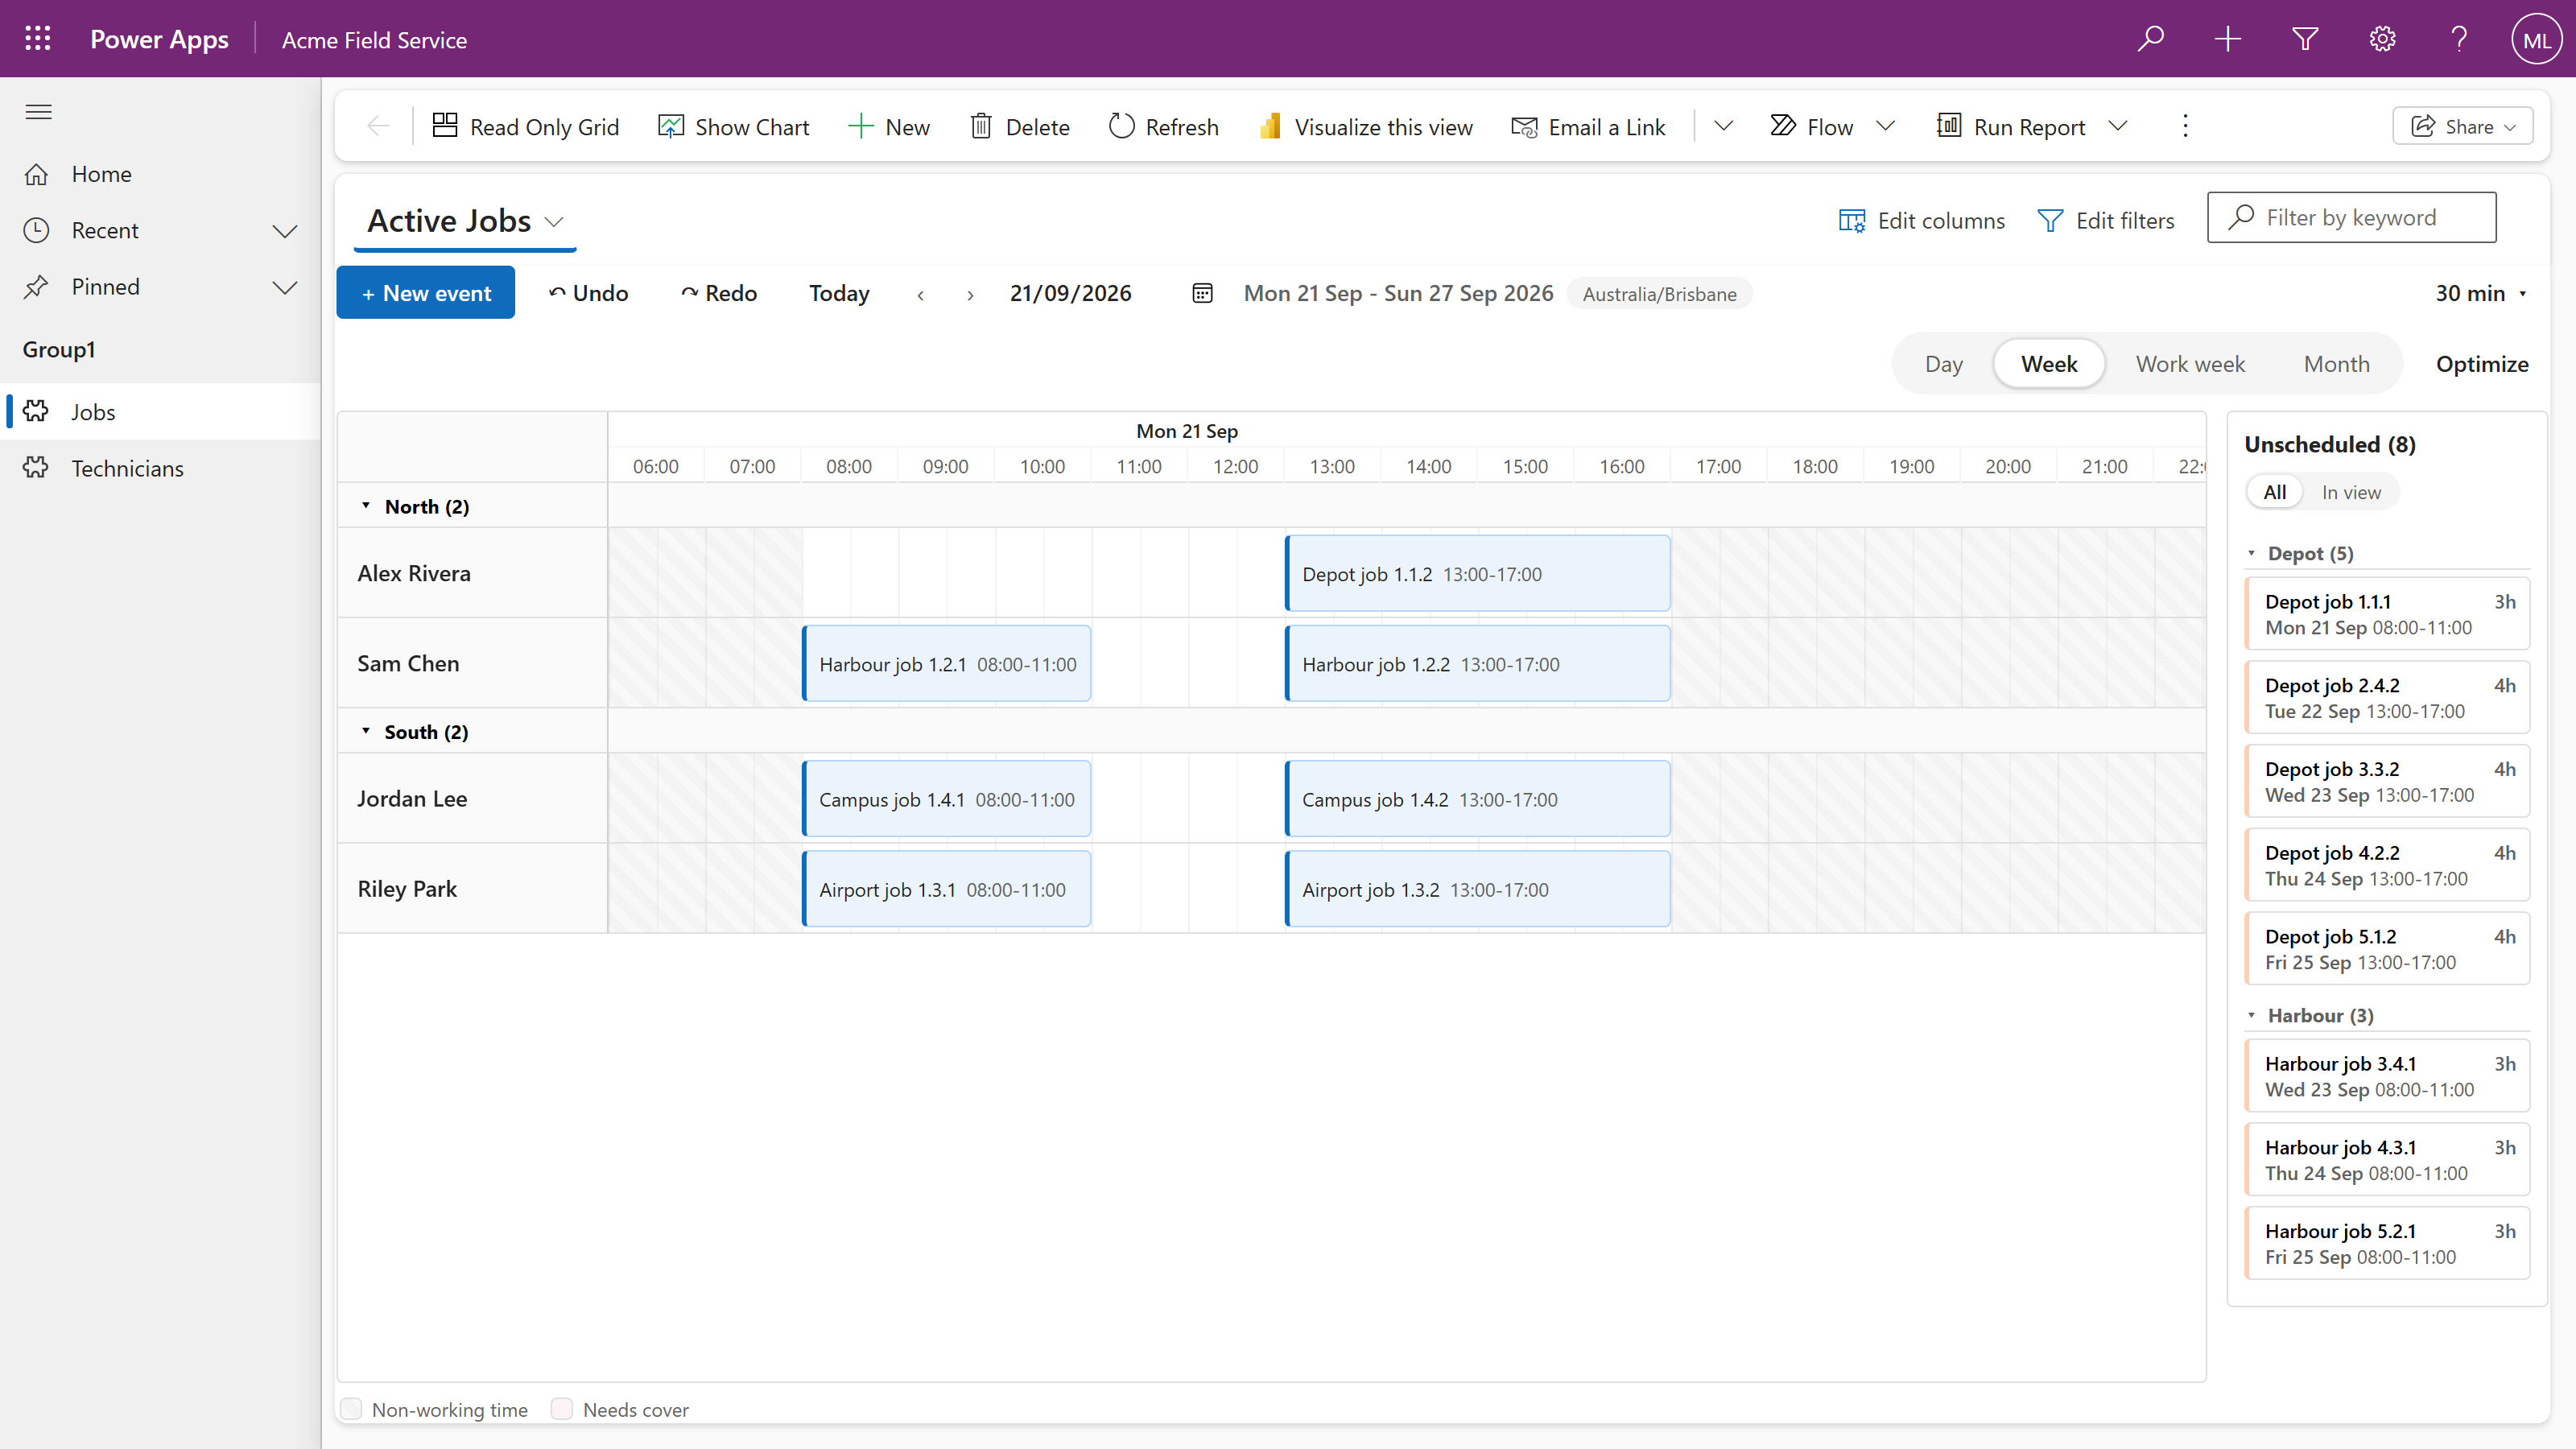
The configured Job view in the test environment. Select the image to see the full-size capture.
The settings live in Dataverse rows. Open them in the maker portal to review or change the agent's choices.
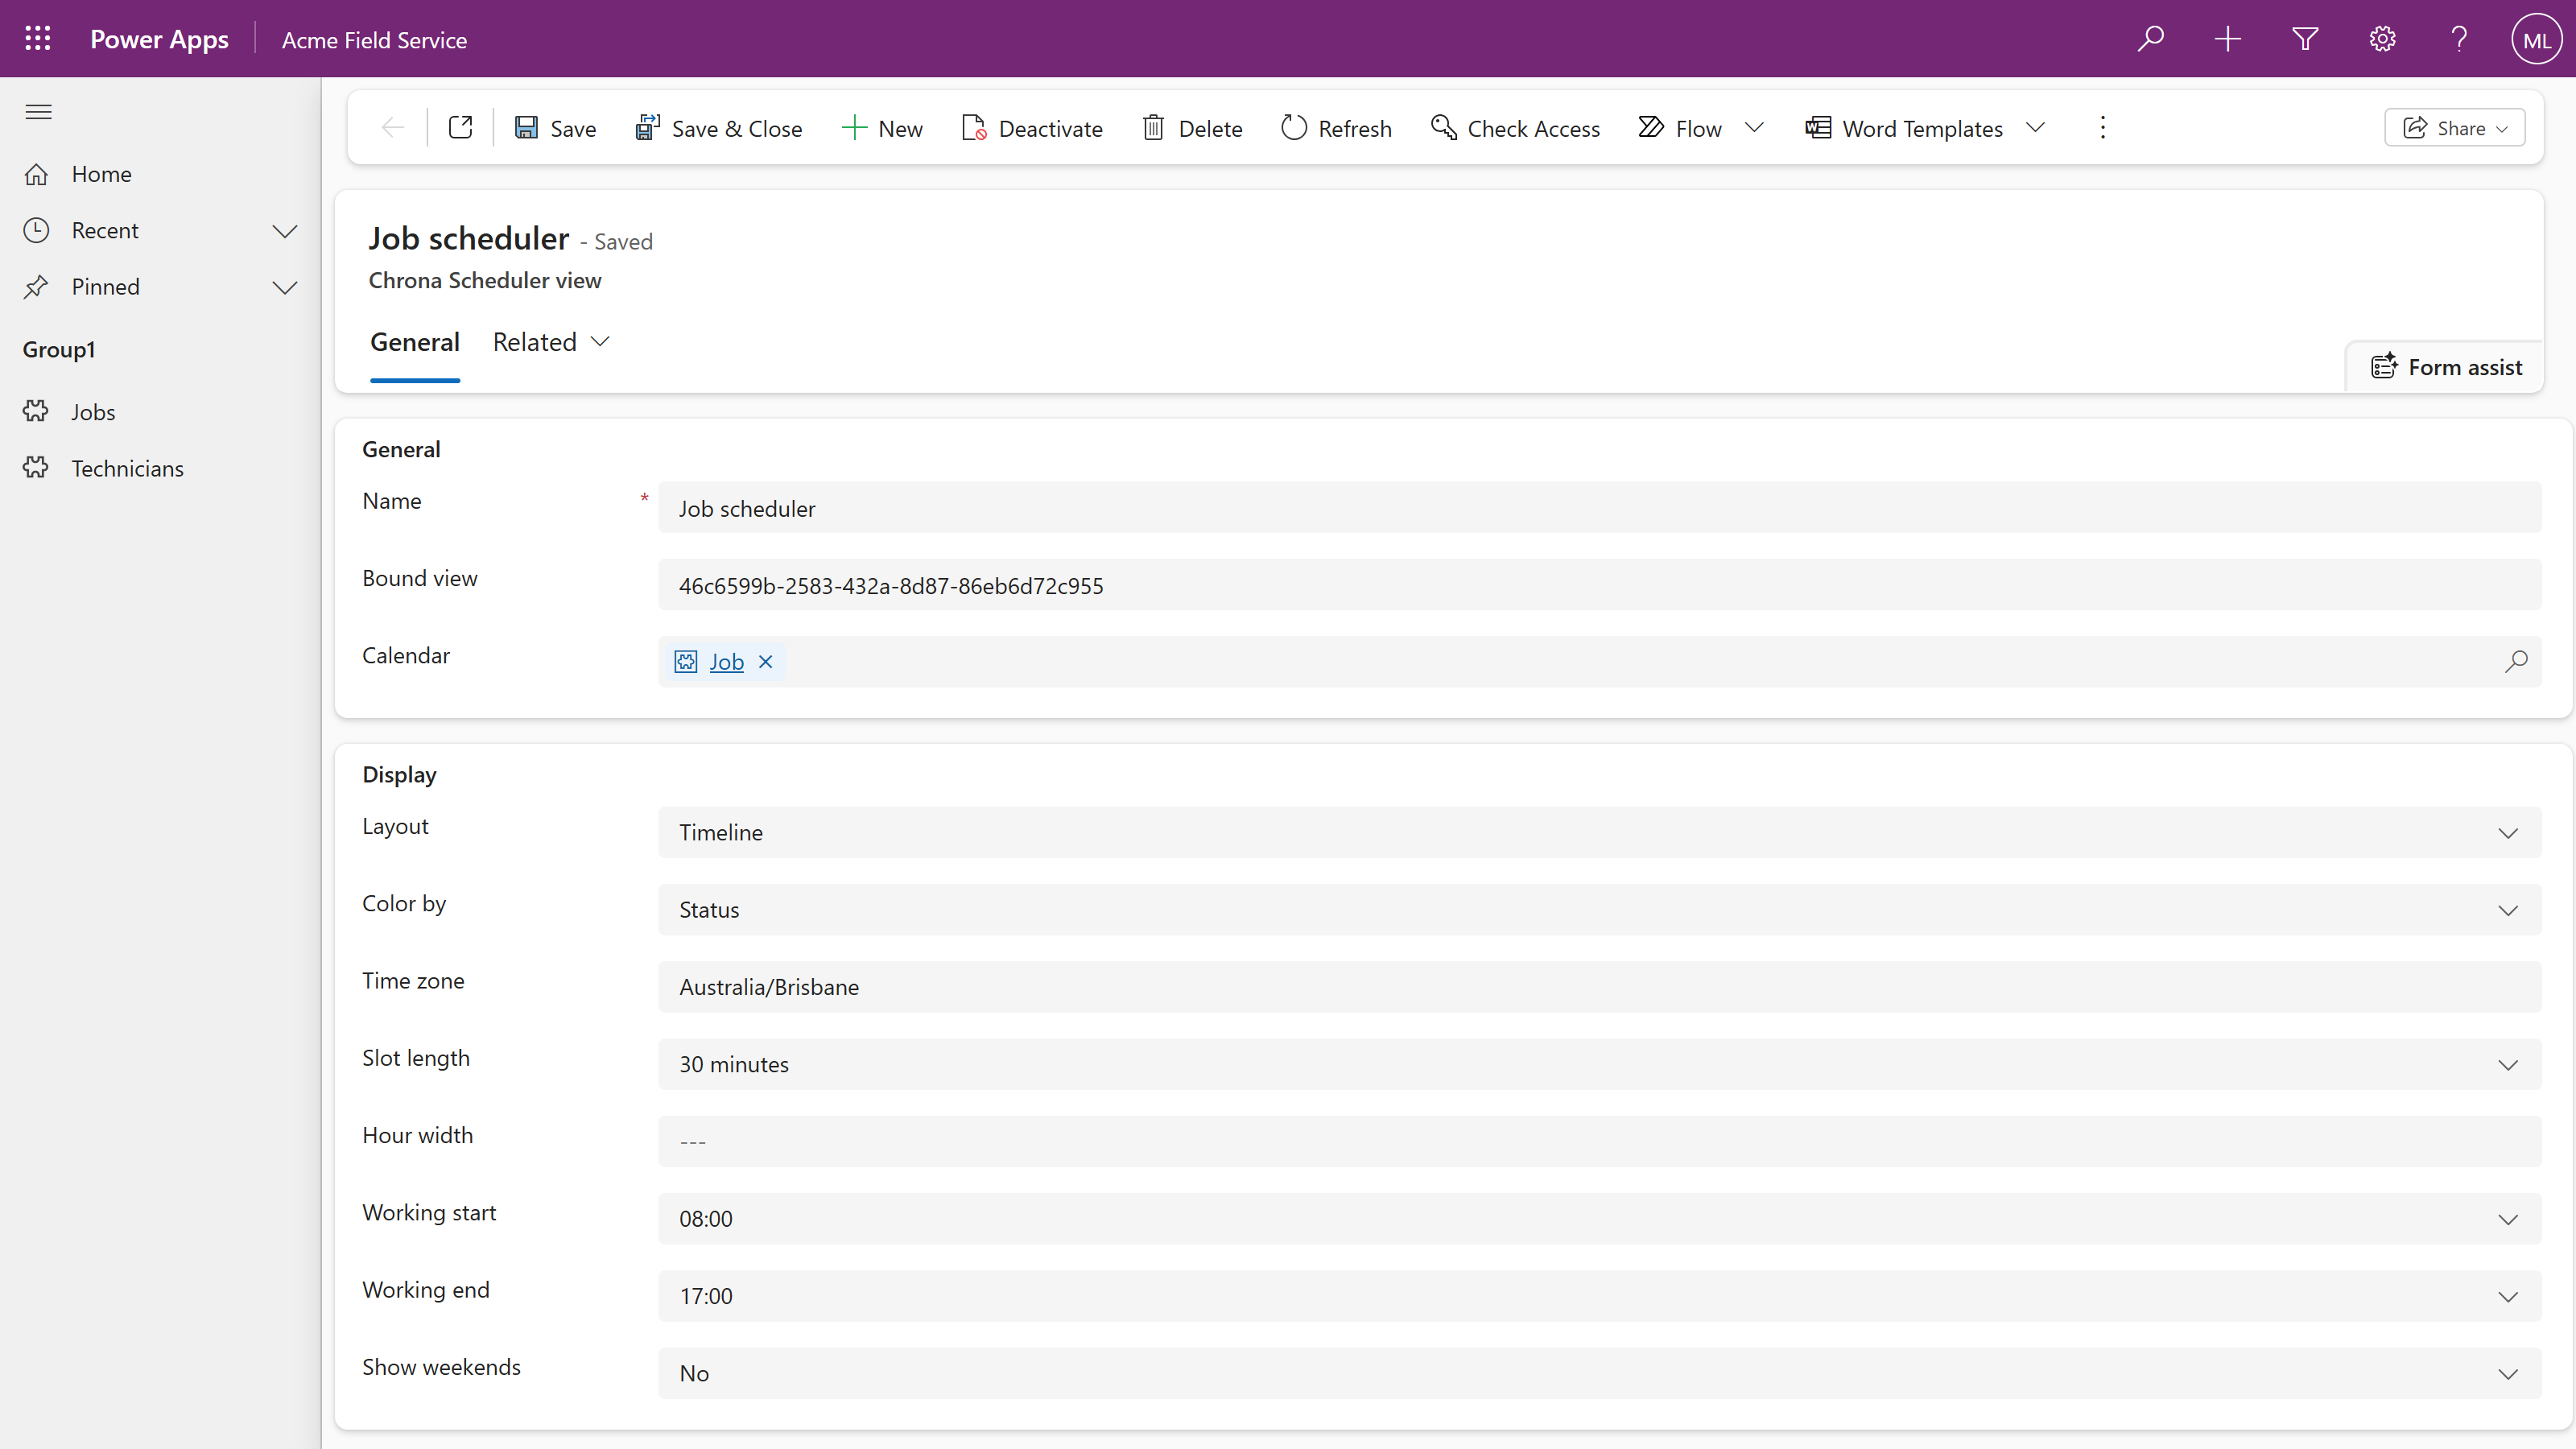
The view row it wrote, with the answers from the exchange in it. A second row maps the lanes to your people.
The Chrona MCP server returns instructions and a plan. It does not access your Dataverse environment. Your own tools make the changes after you confirm them.
The install guideAsk a setup question. Get the matching section of the release guide.
Give it your table columns. Get the scheduler bindings and resource settings.
Confirm the view and settings. Get ordered requests for your Dataverse tools.
For Chrona Workforce Scheduler. Give it an agreement’s rules. Get ordered requests; your agent links the people.
After you import the managed solution, open an agent, type Chrona in Add a tool, and pick Chrona Scheduler. The connector needs no separate Chrona sign-in.
Check these basics before you copy the prompt.
Read the full install guideWhat the agent needs and what it changes.
Yes. Connect an agent to the Chrona MCP server and to Dataverse tools with access to your environment. The agent can import the solution, map columns and configure the view. You confirm the choices before it writes the configuration. Creating an app may need a step in the maker portal.
A Model Context Protocol server at mcp.chrona365.com. It offers four tools: the published install guide by section or by question, a mapping recipe that turns a table’s columns into scheduler bindings, a generator that emits the install as ordered Dataverse Web API steps, and, for Chrona Workforce Scheduler, a generator that turns an agreement’s rules into the same kind of steps.
No. It holds no credentials for your environment and makes no writes. It answers questions and returns plans. Every write is made by your own Dataverse tools, under your own identity.
No. An agent with MCP and Dataverse tools can do the install. The Copilot Studio connector appears in Add a tool after you import the managed solution. A Copilot Studio conversation uses Microsoft’s Copilot credits.
Which view of your table opens as the board, which columns hold the title, the start, the end and the person, which time zone your planners work in, and how the bars should be coloured. Nothing about Chrona itself.
It may need your help. In our test, the Web API left an app draft that could not be published, so the app was created in the maker portal. The agent can guide you through that step.
Any Dataverse table with a title, a start and an end. A lookup to the person or asset each row belongs to gives the board its lanes.
Chrona Scheduler is free and needs no Chrona account. Your Dataverse and agent licences still apply. Copilot Studio conversations use Microsoft’s Copilot credits.
Start with the free scheduler. Use Auto Schedule when you need it.